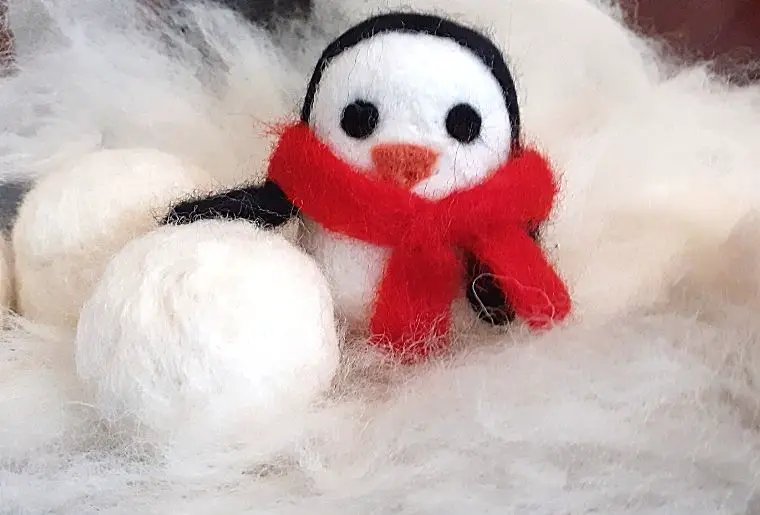
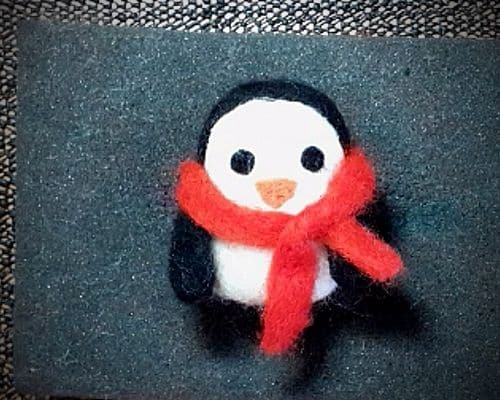
I love penguins they are so cute and such fun to make. I wanted to needle felt a penguin but wanted it to be a fun easy project that was suitable for every felter from beginners onward. The penguin had to be cute. The result is Wobbles the Penguin.
To make a penguin. Take your core wool and felt an oval. To that add a white front and black back. Felt and add two flippers, an orange beak, and big round eyes. Decide on which prop you want. It could be a fish, heart, or scarf. Felt your chosen prop.
I have shared how I made Wobbles here so that you can make him for yourself. I hope you enjoy this project I know I did. I have shared step by step instructions along with photos to help you to make Wobbles the Penguin
Needle Felt Wobbles The Penguin With This Easy Felting Project
Tools for this project
- Large (36), medium (38), and small (40) triangle needle felting needles
- Needle felting pad or mat
- Finger protectors (essential as needles are very sharp)
- Needle holder (optional)
Materials List to Make Wobbles the Penguin
- Core wool (you can simply use white batts if you prefer or don thave core wool) approx 7g (0.24oz)
- White wool Batts (optional you can leave him with just core wool only white is much brighter) (you only need a small amount, 2 g should do it (0.07oz)
- Black wool in Batts or Tops 2g, (0.07oz)
- Pale orange wool Batts (a tiny amount for the beak)
- Red wool Batts (Optional, see the props section at the bottom of the page)
- Aqua wool (Optional, for the fish)
- Plastic eyes (optional as they can be felted as I have here)
Note if you have tops you can use them. I have found that batts are easier to use than tops but you can easily felt Wobbles if you have tops/roving rather than batts. Just mix up the wool before you start.
If you also wish to view a video tutorial you can find it on how to felt a penguin.
Tutorial How to Felt Wobbles the Penguin

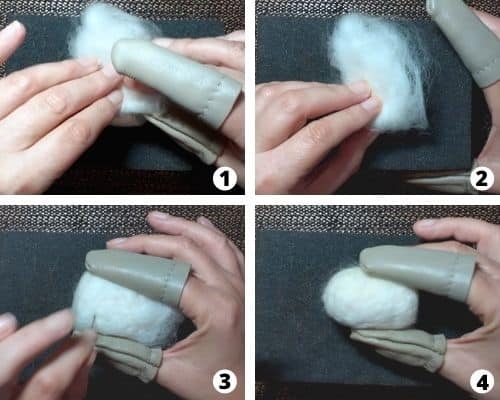
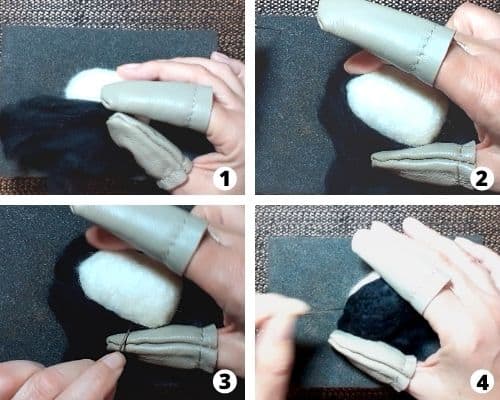
- Start by creating an oval shape with your core wool. Create a length of wool then tuck and roll along the length to create an oval shape. Do the best you can it doesn’t have to be perfect.
- Tack the ends of the wool to the shape so that it doesn’t unravel again.
- Now you should have your shape ready to felt.
- Using your large needle felt up and down the length of your oval all the way around. Do this a couple of times. The aim is to felt all over the body and not in one place only.
- Next start to felt the curved top of your penguin.
- Now start to felt the flat base.
- Go back to the long sides and felt them down again.
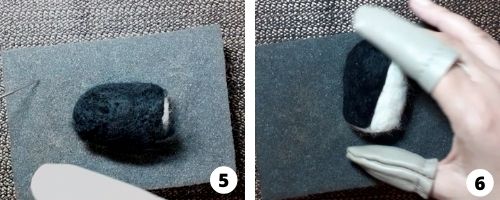
- Your penguin body should now be taking shape. Continue this process until you have a firm clear shape like the one below. You want the body to be firm as we are going to start to felt onto it now. But not too firm or you won’t be able to felt into it easily.
Felt Your White Wool onto the Oval
- Next, take your white wool if you are using it and cover half of the oval shape.
- Either felt so that the white goes under the bottom of the penguin or line up with the bottom. Here I have bent it over to give a smoother finish around the edge of the bottom of the penguin.
- You need to make sure that enough of the body is covered so that when you add your black wool it covers the white wool.
- Felt so that the wool covers the front of the penguin fully and evenly. Once you are happy with that you are ready to add the black.
Felt The Black Wool Onto Your Oval Base
- Pull some black wool to the amount you think you need to cover your penguin. You don’t have to cover it all at once. Here I use wool tops but batts are way easier to use for this so if you have bats use those.
- Depending on your design position your wool into place. Here I have chosen a simple straight design. So the wool is placed along the white edge to form an arch shape.
- Felt along the edge of the black to create a smooth even line. You may need to fold over the wool to create an even edge.
- Continue to work on the edges over the top of the head and down the other side of the body.
- Felt the rest of the black around the back of the body. Make sure you cover the entire back of the penguin.
- Keep felting over these areas until the black wool is even and well attached and won’t easily pull off. Drop a needle size if needed or you start to get holes.
How To Felt The Penguins Flippers
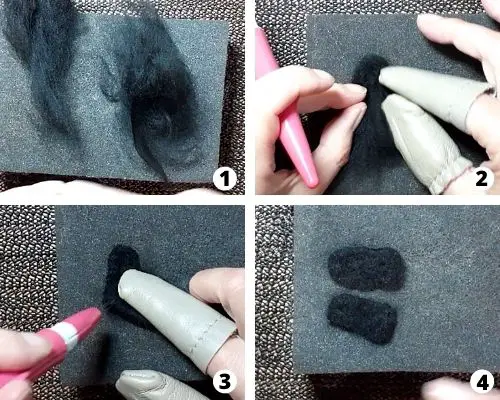
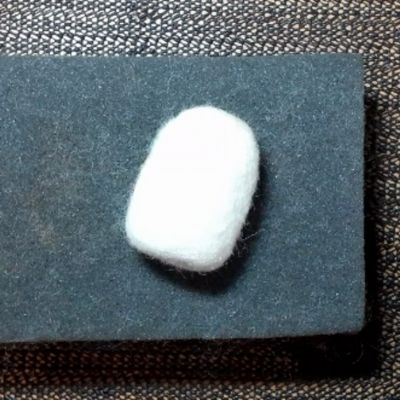
You are aiming to make a shape like these here:

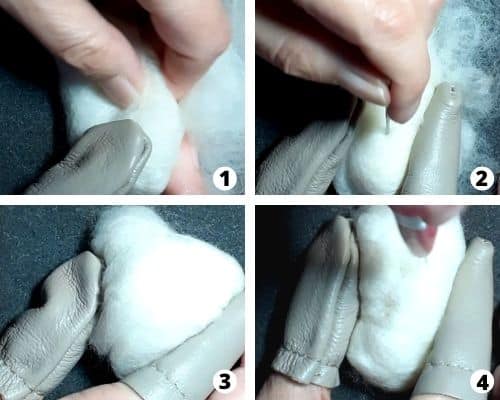
- Take two small pieces of equal-sized wool. Do the best you can, don’t worry if it’s not exact.
- shape them into a flat long narrow shape like the diagram above. Note though don’t do what I have done here. Make sure you put your needle down somewhere safe when working on the shaping.
- Felt into shape. Make sure you turn them regularly while felting to avoid them getting felted to the pad. Don’t worry about the loose strands they will felt down. If you felt the flippers in tandem it will be easier to judge if they are the same size.
- Make sure they are about the same height and width as each other. You can leave one end loose ready to felt into the penguin if you want. As I have only felted lightly here I didn’t need to but it is easier to attach with loose un-felted ends.
5. Tidy up the edges and make sure they are well-shaped.
6. Position the flippers onto the penguin. Check the flipper height, position, and angle individually and relative to each other. They should be the same distance apart on each side of the body.
If you are using props like the heart, fish, or scarf (at the bottom of the page) think about the height and position of the fins on how they need to be to include these props. If you are using the fish or the heart you might want to bring his fins forward so it looks like he’s holding them. If you’re using the scarf they need to be low enough so it can go over them.
7. Now use your felting needle to felt them onto the body. Felt each flipper into position lightly then check you are happy with their positions. If not change them before you felt them down fully.
8. Once you are happy with their positions make sure they are firmly secured. You should not be able to easily pull them off.
Now To Needle Felt His Beak
The beak is going to be a simple triangle felted onto Wobble’s face. You can also create a cone and attach that. However, the triangle is very simple to do.
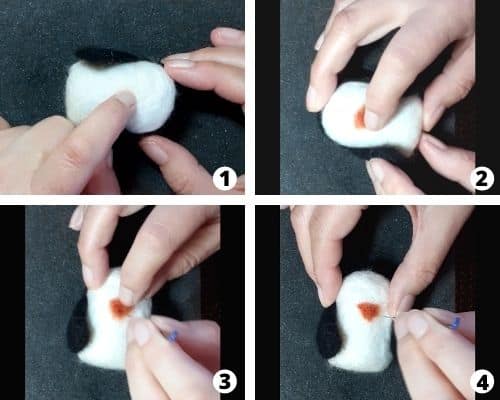
- First, you need to decide where you want to place your penguin’s beak. Each penguin will be slightly different in shape. You need to allow enough room above for the eyes to sit comfortably without being too high. And enough room below so that you can place his scarf. The beak also needs to be in the center of Wobble’s body.
Where I am pointing in this picture is a good spot. - Take a tiny amount of orange wool and roughly form into a triangle shape. Place it onto the body where you think you want it to go and see if it looks right to you.
- If it looks OK to you take your needle and lightly stab the triangle into place. Don’t felt it down completely as if you don’t like the placing you can then remove it. Check you are happy with the position of the beak if you are, continue to felt. If not remove it or add wool to make it look better.
- Continue to felt the beak until it is firmly felted and looks like part of the penguin. It should be flush against the body. Gently use your needle around the beak edges to make sure you have a neat triangle. If you have any difficulty with crunching sounds, needle resistance or large holes drop a needle size.
Needle Felt The Eyes
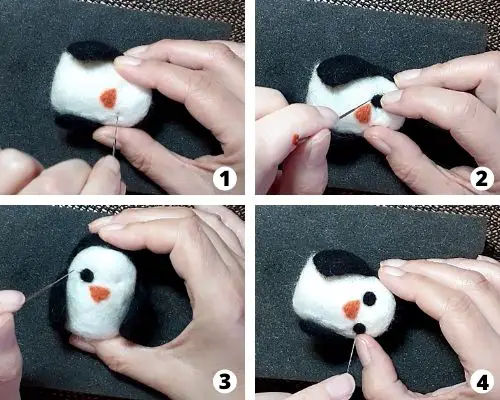
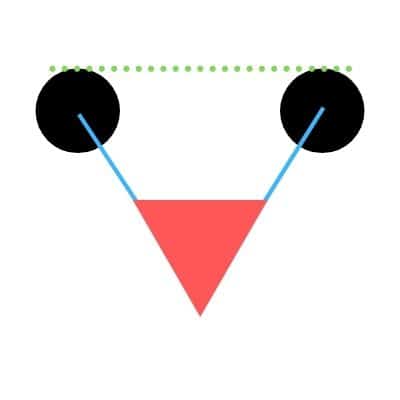
1. Decide where you want to put the eyes.
- The eyes should be placed evenly on each side of the penguin, at a rough triangle from the beak to the center of the eye. (See diagram below blue lines) Note: if your beak is narrower or wider than the one shown here, you may need to adjust your eye placement.
- They need to be the same height as each other (see diagram below, the green dotted line).
- And about the same size as each other.
2. Pull a really small amount of black wool and split into two even amounts. Make a flat circle and position onto the eye (either eye will do)
3. Needle felt the wool onto the eye to create your circle. Do not felt fully yet.
4. Positon the 2nd eye and felt into position. Check you are happy with the placement and adjust if you need to. Then felt both eyes fully onto the penguin making sure you have a small circle. Carefully felt any loose strands into the black of the eye.
3 Super Cute Simple Felted Penguin Prop Ideas
You don’t have to but it will make your penguin extra cute if he has props.
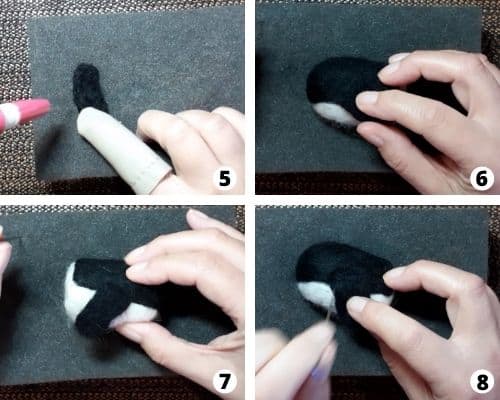
1. Wobbles Loves Fish, Felt a Fish for Your Penguin
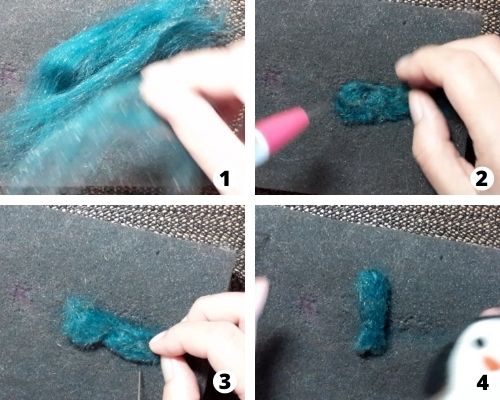
- Pull off a small amount of wool. Here I have chosen a dark turquoise with Angelina in it.
- Fold it into a flat oval shape and felt it up and down. Turn it regularly so it doesn’t stick to your mat.
- Now that you have a flat oval felt in the shape of the fins. To do this pick a point along his body where you think the fins should go. About 1/3rd of the way or slightly less will work. It doesn’t have to be exact.
Use your need to gently shape the dent of the fin on the narrow edge. Just keep poking both sides until it looks like the picture above. Be very careful how you hold your fish and where you point the needle as it is very easy to catch your fingers. Wear protectors if you can. I didn’t as I couldn’t control what I was doing and show you at the same time. You could see the fish under the protectors! - Use your needle to put a slight dent in the end center of the tail.
2. Create a Heart For Your Penguin
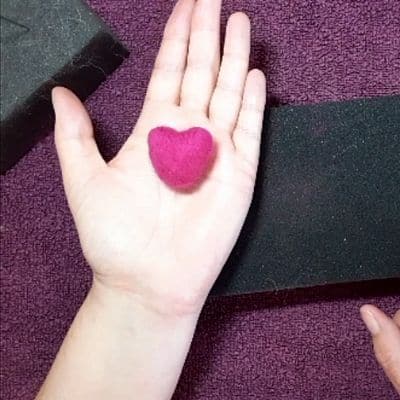
I have seen lots of cute penguins with hearts. A heart is a popular prop for your penguin.
3. Keep Your Penguin Warm With This Cosy Felted Scarf

You don’t have to felt your penguin’s scarf if you don’t want to. You can make it out of pre-made flat felt. Or if your other hobbies happen to be knitting or crochet you can knit or crochet a scarf for your penguin.
- Use whatever color you prefer. If you want to spice up the scarf use some Angelina with the wool to add a bit of sparkle. Angelina makes it a bit harder to felt.
- Create a long thin strip of the batt. You don’t want the wool to be too thick. To make sure that the edges are smooth they are turned in as you felt.
- Use your needle to felt up and down the length of your wool. Do this in small stretches. Make sure you turn your wool frequently or it will felt on to the mat, especially if you are using foam as I have done here. Don’t worry if you get strands of wool where you have felted. You don’t want to felt one-piece solid before moving on.
- Felt up the full length of your scarf but leave the ends splayed and un-felted. When you are near the end of your scarf wrap it around your penguin to see how long it is.
- If it is not long enough add some more wool to it. To do this overlap the new wool onto the splayed end of your scarf. Now felt it in. Keep doing this until your scarf is long enough to go around your penguin and hand down.
- Once you are happy with the length and you have felted both sides so that the scarf is one piece you can turn in and neaten the ends. Don’t worry if it is slightly fluffy. Smooth it out with your fingers or just leave it it makes the scarf look soft and warm.
Tuck your scarf over and position it so that you are happy with it. You can gently pin it with your needle if needed.
Now Wobbles is finished. He’s ready for his photoshoot and social media debut! Or to go on display.
