This fun to create rustic pumpkin is a great project for beginner needle felters and anyone who loves to felt. It is perfect as a project in its own right or it can be added to other projects as an extra.
To needle felt this simple rustic pumpkin you need to use your large, medium and small felting needles, to shape your core wool into a flattened ball. Add ribs. Cover your pumpkin with color. Add the greenery.
Here you can learn to create the beginner’s pumpkin with step-by-step instructions including lots of pictures and a video to help you through the process. You will have your pumpkin finished in no time.
Needle Felt this Easy Fun Rustic Pumpkin
This is a fun project to do that expands on the ball shape and adds more skills to your felting abilities.
Objectives of this tutorial
- Learn to add different shapes to your sculpture.
- Attach wool to a sculpture.
- Shaping
- To have fun!
Tools ~You Need For Your Pumpkin Project
- Large small and medium triangular needle felting needles. 36, 38 & 40 gauge needles
- Also, a medium star needle would be useful if you have one.
- Finger protectors
- Felting pad or mat
Materials Needed To Create Your Pumpkin
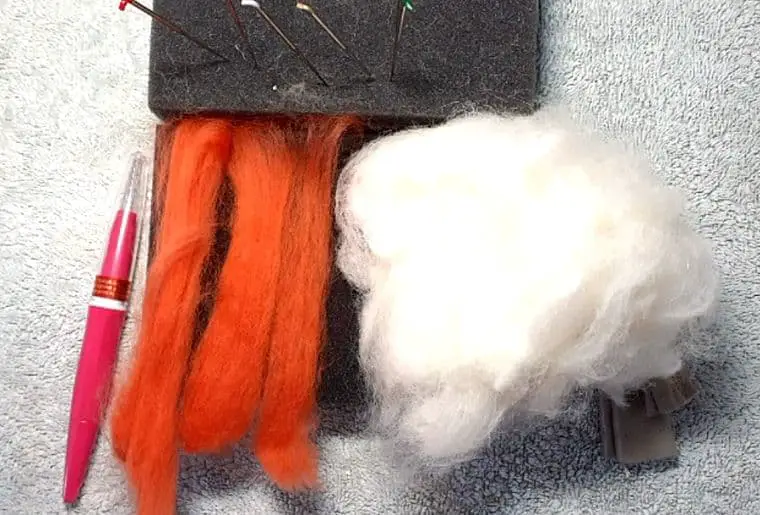
- Core wool (or colored batting if you don’t have any core wool). Around 4-5g (0.17oz).
- Orange batting or tops/roving. The wool should be a deep orange pumpkin color. 2-3g (0.07oz-0.10oz
- Mid to dark green wool. A very small amount is needed for the top. A couple of grams 0.07oz).
You can use bats or tops/roving, etc. I used tops because I had that color in tops. If you are going for the fuzzy rustic look you want bats or wool that has a rough finish to it when felted.
Instructions to Make Your Rustic Pumpkin
Tuck And Roll To Start Your Shape
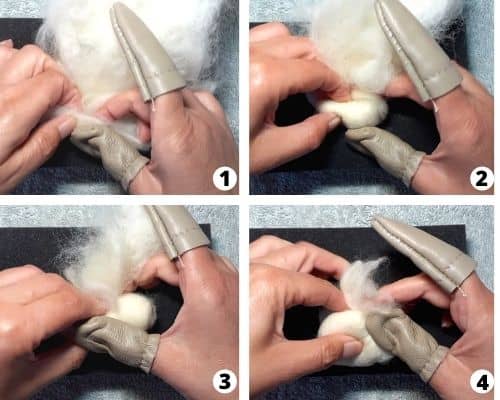
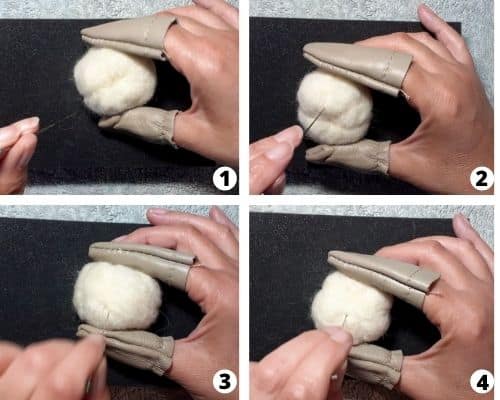
- Pull off enough core wool to make a ball. (Note if you are not using core wool simply use your batting color here instead). Place it so that it is in a flat rectangle,
- Take one end and roll it up bending in the ends as you go.
- Tuck and roll to create a ball shape the best you can. Don’t worry if it is not quite a ball. We will work on the shape as we go. (This part is like the ball tutorial).
- Create a ball or oval shape.

- Use your large felting needle to secure the end to the ball.
Create Your Pumpkin Shape
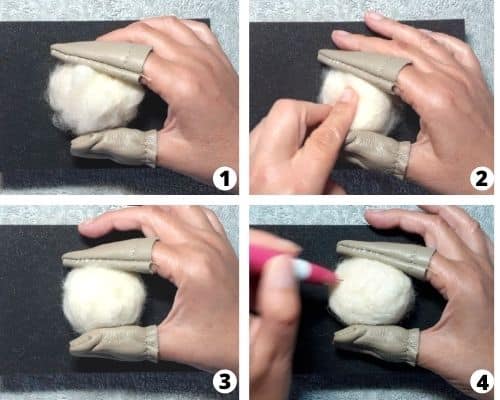
Unlike a ball pumpkins are fairly squished, flatter on the top and the bottom of the pumpkin. Keep this in mind while you felt.
- Stab all over the surface constantly making sure you are creating the shape you want.
- Do this until you have a pumpkin shape. At this stage, you won’t have the indentations of the segments or the top and bottom just the overall shape. You want it firm enough that it holds its shape but not too firm as there is still a lot of shaping to do. This shape is very soft, see how much it squashes in when I pike it with my fingers.
- Look at your overall shape, if you look here you can see there are parts sticking out and the shape is still way too soft.
- This flattened ball is starting to firm up now. Work your shape until it is firm enough to hold the segment indents.
Now It’s Time To Create the Pumpkins Segments
- Decide on how wide you want each one. If you have a star needle you can use it here, it is great for felting down quickly. If not use a larger needle. You don’t want to be struggling to get it into the felt though as this can cause it to break.
- Your aim is to make 7-10 segments by using your needle to create the ribs of the pumpkin. Simply felt in a line from the top to the bottom of the pumpkin. This creates an indent from top to bottom.
I read somewhere that pumpkins have 8 ribs, but I have counted several and they don’t always. Don’t worry too much about this just go with what you feel is right. Also, try to keep your segments fairly even but they don’t have to be exact. I will look more natural and rustic if they are not
Create deeper ridges if you want plump segments and shallower ones if you don’t. Pumpkins have different depths of ribs so it’s about what you are happy with. - Repeat your line all the way around the pumpkin. By doing this the segments will stick out while the felted lines will compress.
For a softer effect here I have not felted the general shape too firmly.
Allow some room for more stabbing as you are going to add the color over the top later. - Felt the top and bottom of your pumpkin as these are indented, this will bring your segments together and give you a firmer base to add any stalks or leaves
Add Your Wool Color To Your Pumpkin
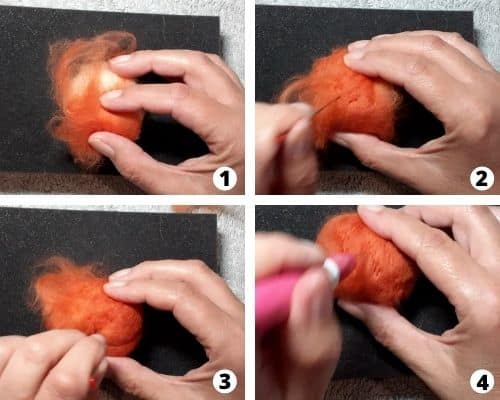
- Now you have a rough shape formed and you can add your orange color. Pull some of your orange wool. If you are using a top/roving with the fibers going the same way you can rough them up before you use them so that they are crossed over.
- With your needle attach the orange to your pumpkin.
- Make sure it’s covered all over. You may find you lose some of your shapes. Don’t worry once your pumpkin is covered you can re-establish your ribs again.
- Make sure your wool is firmly attached all over. If you are going for the rustic look leave it looking fuzzy.
Continue To Work On Your Segments
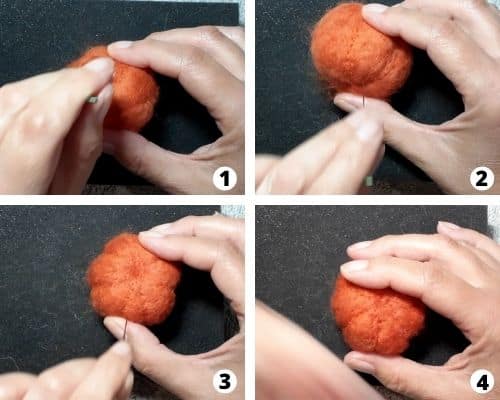
- You may lose some of the definition of your segments when you add your color as this flattens out your rounded part of your segments. These need to be worked on until you are happy with them and their shape.
- You may need to drop a needle size. You can see here I am starting to get holes show. This is because the inner line of the segment is firmly felted.
- Continue all the way around your pumpkin. Remember to make sure the top and the bottom have their indents.
- Once you are happy with your pumpkin shape check it over and decide which is the top and the bottom.
Add Your Stalk or Leaves To Your Pumpkin
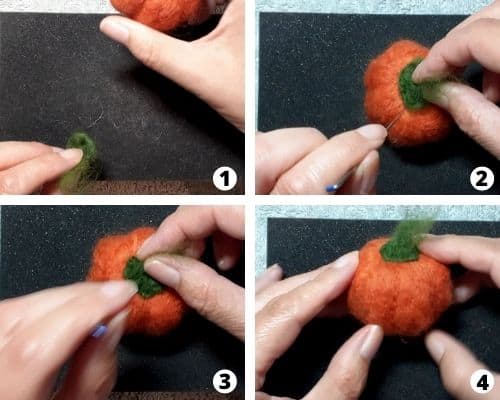
- To add the top take a very small piece of your green color. Create a loose flat circle with the loose wool in the center.
- Carefully felt, it onto the top of your pumpkin around the edges and work inwards. You want a circular wavy shape.
- Make sure that it is firmly attached. While the segments are loose if you do not attach the stalk firmly to the pumpkin body it will come off.
- Leave the top loose for effect. Or felt it tightly. I had intended to felt this tightly to make a firm stalk but liked it like this. It goes with the overall loose rustic feel.
Added Extras To Make Your Pumpkin Stand Out
If you want to you can add leaves, a firm stalk in place of the loose wool. Maybe add some eyes or a mouth if you want a cute pumpkin.
