Learning to needle felt a ball is one of the fundamentals of learning to needle felt. It is one of your basic shapes that can then make many of your felted pieces. It’s one of the first things to learn. If you can do this properly then you can use this knowledge to progress.
To needle felt a ball you gather your felting tools and wool, these include your needles, pad, and finger protectors. Tear off your wool and roll it up firmly and using your needle felt your ball in all directions until firm.
Below I have shared my step by step process for needle felting a tight tidy felt ball. I have used core wool then covered this with a color of my choice. You can felt smaller balls from only a color. The core wool is used as it is more economical than just using pure color all the time. This is a standard practice of most needle felters.

Needle Felt a Colorful Ball
Needle Felting Tools You Will Need
You need to have your basic needle felting tools. These include the following:
- Various sized felting needles in large, medium, and small
- A felting mat
- Finger protectors
- Good lighting, ideally a crafting light.
Materials You Need For Your Felted Ball
For this project to keep it simple I am just using one color rather than using core wool then putting a color over the top which is what you would do with larger projects.
Needle felting doesn’t need many materials to start you can just use the following items:
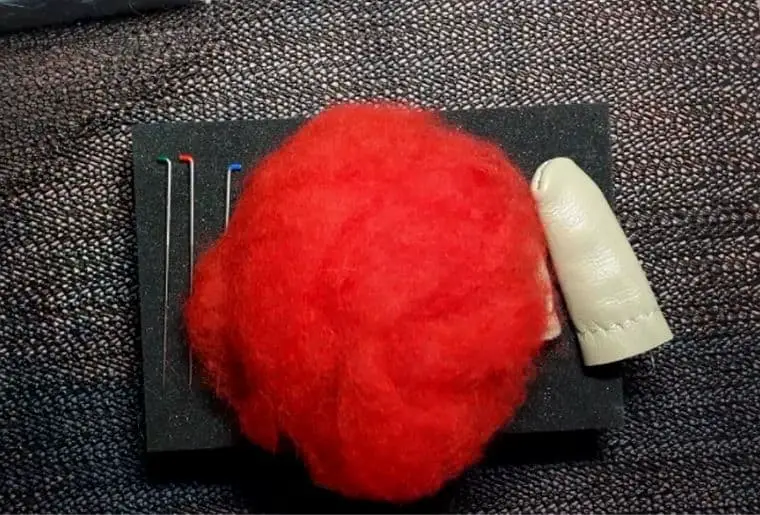
- Needle felting pad or mat of your choice. Most people use a foam pad when they start.
- Finger Protectors (essential to protect from sharp needles)
- Needles large, medium, and small triangular felting needles. (Here I am using color-coded needles Green 36, Red 38, Blue 40 needle gauges) Note: if you have colored needles they may be different sizes to mine as each supplier uses different colors.
- Needle felting wool batting about 5g/0.17oz. It doesn’t have to be exact. If you have tops/roving don’t worry use those. Batts are just easier. If you have tops/roving simply pull the wool apart and mash it up so the fibers are mixed.
Step By Step Instructions On How To Felt Your Ball Firmly
Step 1 – Pull Off And Prepare Your Wool For Felting
Pull Off a strip of your wool batts. Do not cut it as this leaves your ends too straight. Do not put a knot in it. There is no need to.
Choose an amount roughly a third bigger than you want your finished ball to be. It is better to use less wool and add to it later than to use too much wool and need to remove it. It is much easier to add wool than to take it away.
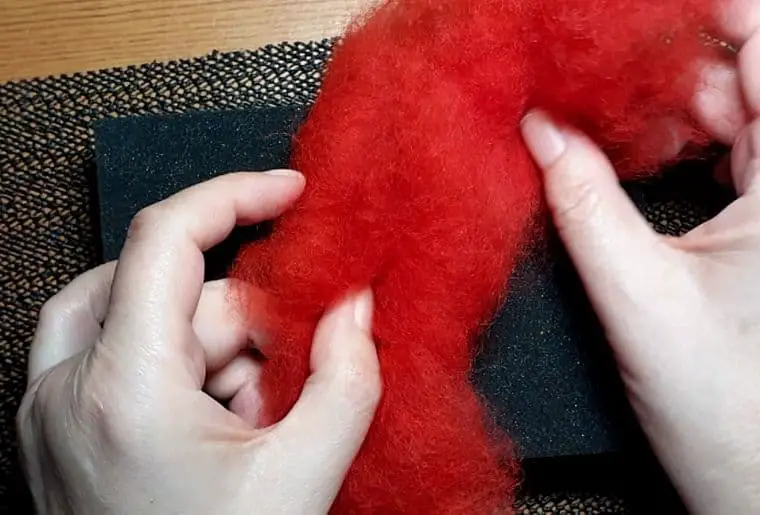
Step 2 – Place Your Wool Onto Your Felting Mat/Pad
Arrange your wool so that is is a long flat strip as above (step 1 Pic). Place the strip of wool onto your felting pad.
Step 3 – Roll Up Your Wool Into A Ball
Take one end of your strip and start to roll the length of your strip. As you roll, keep it tight this squeezes the air from it. Also, tuck in the sides.
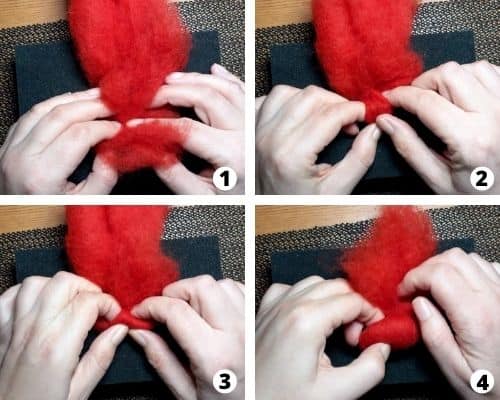
Tuck and roll your wool stages 1-4
- Create a long flat strip of wool.
- take one end of your wool and fold it over.
- Roll your wool up. At the same time tuck in the sides
- Roll, and tuck, roll and tuck until you get to the end of your wool. Don’t worry if it isn’t a ball and looks more oval.
Step 4 – Pin your Rolled Ball Ready to Felt
Pin the edges of your ball with your large felting needle.
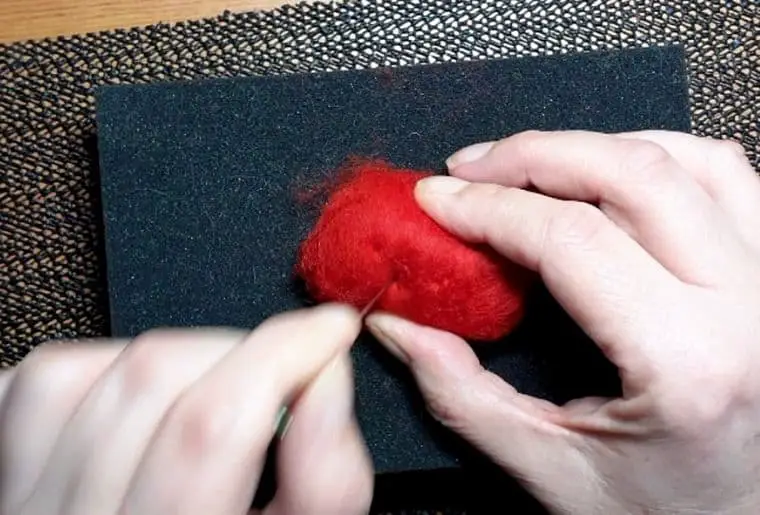
Ideally you want this to be as round as possible. Here mine is slightly oval. It this happens you can either try again before you start to use your needles or just work around it. It will still make a good ball shape.
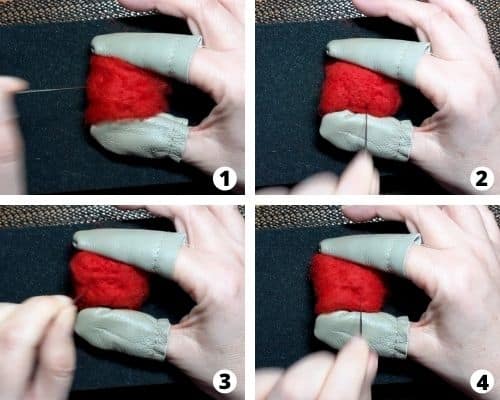
Step 5 – Begin To Felt Your Ball
Now use your large felting needle to gently stab your wool. You should stab the wool in all directions and not only one side. This creates an even shape and will help you later on when you make more complex objects.
Concentrate only on this. Do not have the TV on or take notice of other people. You will save yourself lots of pain as the needles are very sharp and it hurts like crazy if you catch yourself.
It’s good practice to keep your hands behind your object when possible and needle that way you are less likely to stab yourself. Also, keep your item you are felting firmly on the mat. This gives you better control.
It’s the barbs of your needle that push down your wool so they need to only go into the wool up to your barbs. Don’t worry too much about it, just keep a nice, even steady movement. Don’t try to go too fast either speed will come with time. It’s better to control your movements than getting speed.
Keep your needle straight as it goes into the ball and as it comes out. If you don’t you will break the needle. By doing this you will build up good techniques and save yourself many needles.
- Hold your ball shape on the felting mat. Do not hold it in mid-air. You need a firm base for both safety and control.
- Start to felt your ball all over. Keep your fingers out of the way. Push your needle into the wool and removed it again.
When the needle is free from the wool then move it to the next part you wish it insert the needle. If you try to move the needle or the ball with the needle still in the wool the needle will break. - Move the ball and continue to felt. keep doing this until you have gone all the way around the ball.
- Move the ball so that the ends are felted. Make sure you are not only felting around the “length” of the ball or you will end up with a sausage shape.
Step 6 – Continue To Felt Your Ball Shape
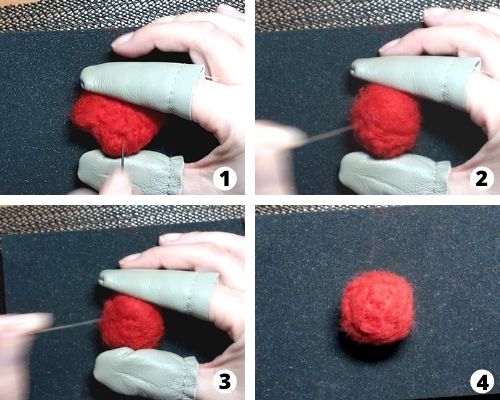
- If you have parts of the ball that are sticking out these need to be worked on. Felt these so that your ball takes shape. Always working towards getting the ball to be round.
- Now the bumps are being removed the ball takes shape.
- Continue to work all over the ball with your needle.
- As you can see the ball is really starting to take shape now. It’s much rounder, firmer, and looks felted. This stage is where beginners often stop felting.
If you squeeze the ball here you will see and feel that there is a lot of give in this ball. If you look at this picture you can see ridges and fluffiness. More felting is needed. While for a single shape you can get away without a firm finish if you are making something with several parts you want this ball to be firm like a tennis ball.
Step 7 – Drop a Needle Size
Continue to felt until your ball is fairly firm. Change needles down a size from 36 to 38 or 38 to 40 gauge depending on what size you started with and continue to felt.
You can feel when your ball is too firm for your needle. It goes all crunchy and there is some resistance. Decide then whether to drop a needle size or to continue to work on your ball.
Step 8 – Gently Squeeze The Ball
Depending on your chosen wool your ball should be fairly smooth. When you place it between your finger and thumb it should feel firm and spring back slightly.
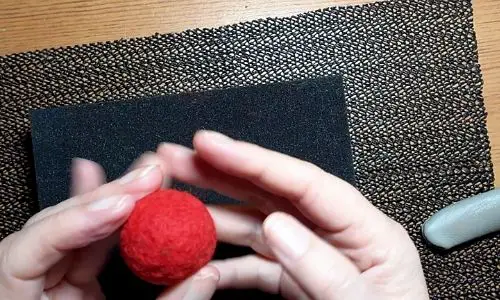
If you are not happy with the ball and it squeezes down too much continue to felt it all over. Check it for any small bumps and felt those. You can see in this picture bottom left a dip and bump. This needs to go.
Step 9 – Final Check Over
When you are happy with the overall shape and firmness of your ball do a final check over.
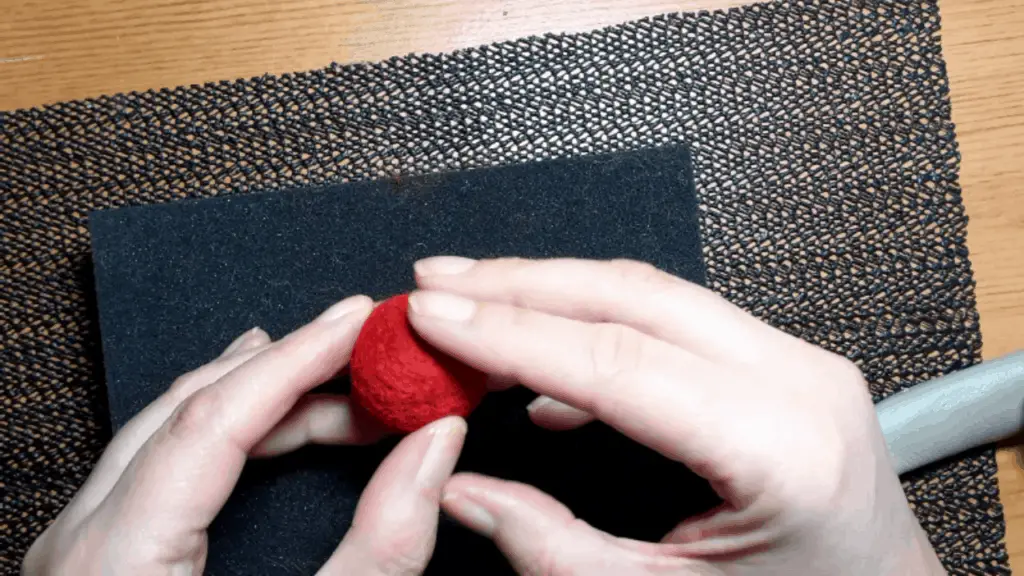
- Check its overall shape
- Check for smoothness and bumps
- Check for and remove any needle holes. Quickly roll the ball between your hands that should remove the worst offenders. Also, use your needle at a shallow angle to remove any holes.
How To Make A Ball Video Guide
A Felted Ball May Seem Basic But…
A ball may seem basic but it along with a few other shapes is a foundational shape that you need to know for needle felting. Sometimes people start with large projects without knowing how to felt.
Sometimes this works but more often they end up with a wobbly piece of loose work and no idea why. By learning to make a ball you are learning many techniques that you can use in the future on all your projects.
Also, a ball makes lots of things in felting like ornaments or baubles, beads for necklaces, etc. My teddy bear heads are basically balls.
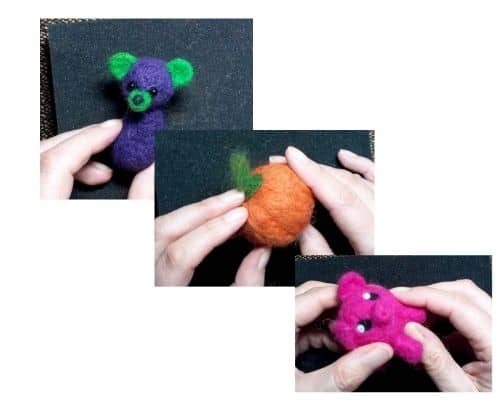
This is an example of a few easy projects that beginners that have some basics can do using basic round shapes plus some other basic shapes like the triangle and cone. Admittedly the bears are a bit more in-depth but still doable.
If you want to try the Truffles the pig tutorial you can find him here