How to needle felt an egg shape is an important step on your felting journey. It’s something that every felter should know even if you don’t want to do easter eggs. Here, I share what I’ve learned about felting eggs.
To felt an egg shape you need your usual felting tools, some core wool, and some colored wool. You then take your wool and roll into an elongated ball. Tack down the edges. Using the needles shape your wool into an egg shape.
Below I have created a step by step guide along with pictures to help you create your egg shape. There are also ideas for easter designs if you want to turn your egg into an easter egg. Also, there is a video if you prefer to felt-along.
How to Needle Felt Egg Shapes for Easter & Other Projects
Needle felting an egg shape is much the same as felting a ball only you elongate the edges to form an egg.
Although most people think of eggs for Easter this is one of the basic shapes in felting that you can use for many of your projects so don’t overlook learning the egg shape even if you do not celebrate Easter as it will come in handy in the future.
It is also a great way to expand beyond the ball and start learning to shape your projects.
Felting Tools Needed For This Project
Your usual basic felting kit is needed. No extras requried:
- Felting needles in small, medium, and large triangular
- Felting mat or pad
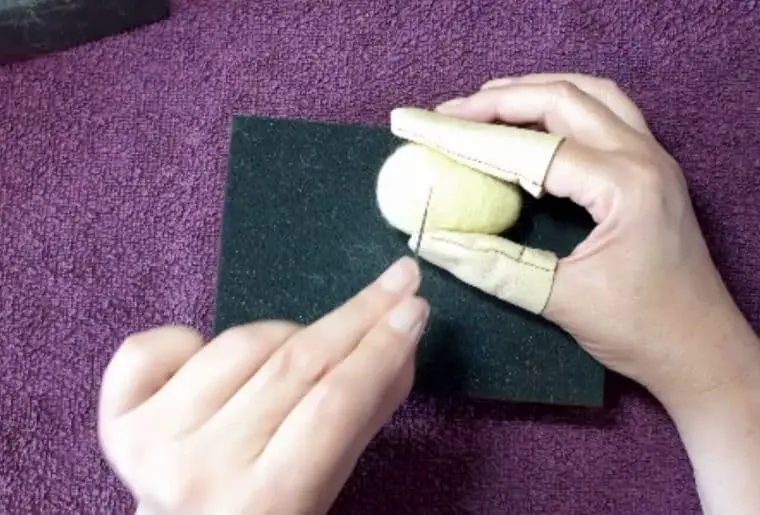
- Finger protectors**
**Felting needles are VERY sharp. Be very careful while felting to keep the needles away from fingers and hands (or any part of the body) and wear finger protectors.
Materials Needed to Create Your Egg Shape
- Core wool*
- Colored wool of your choice
*You can just use colored wool if you prefer. However, as projects get larger you should use core wool for the centers. It’s quicker and easier to felt. It’s also more economical.
Instructions to Felt Your Egg
Take your core wool and tear off a long strip (length or weight) (do not cut it). This will form the center of your egg shape.
If you have made a ball from my ball tutorial the beginning of your egg shape is exactly the same as this except you create an oval and not a ball.
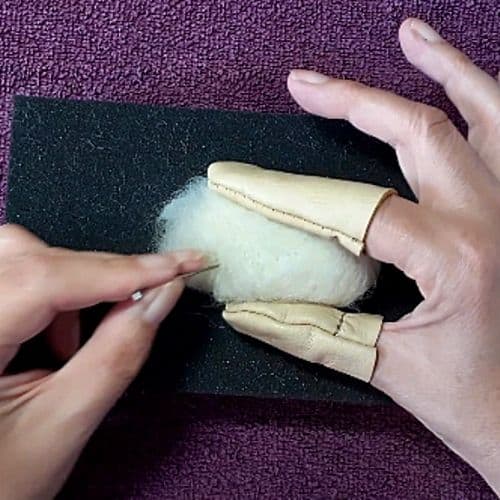
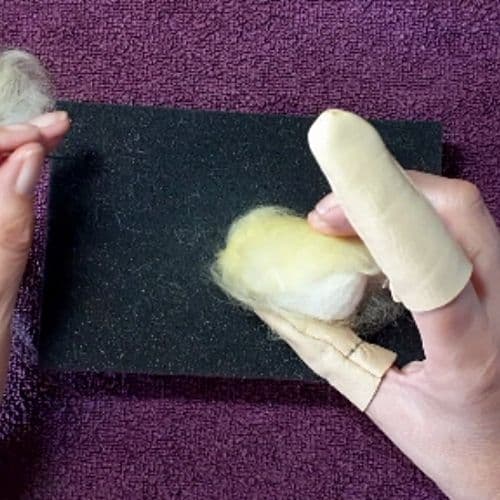
1-3. Place your wool onto your mat and take one end and tuck it in then roll it and tuck it until you have an elongated ball shape.
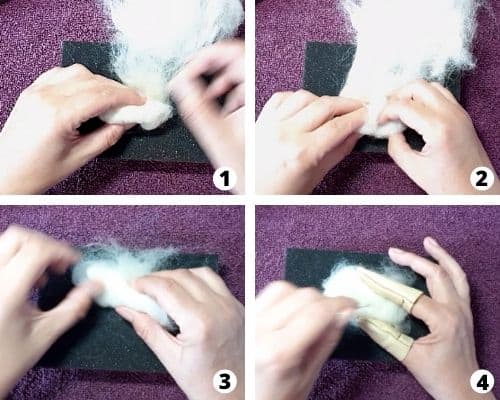
4. Tack around the join so that you have one solid piece. This keeps the wool in place so you can start to felt.
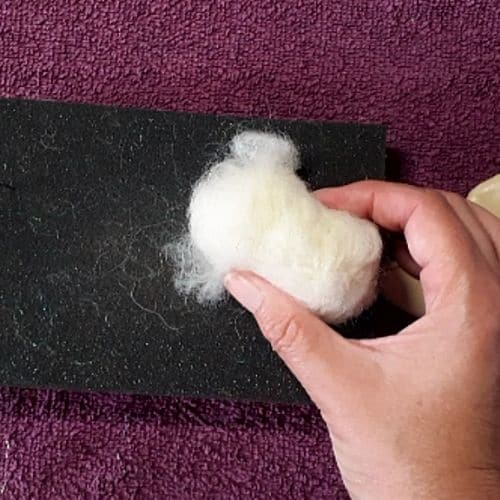
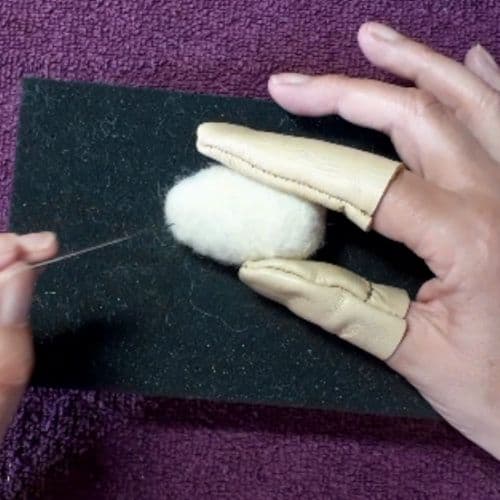
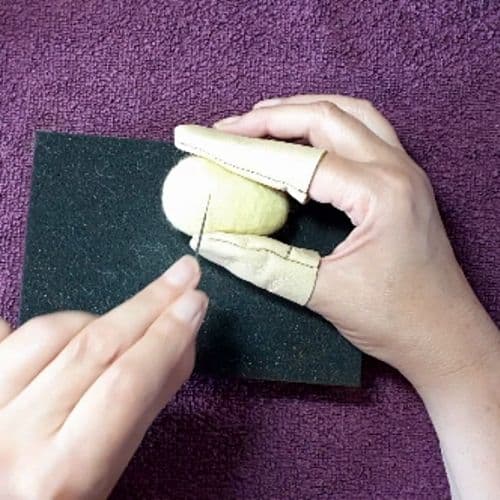
5. Now that you have a general shape, start to felt it into your shape with your large felting needle.
Make sure that you felt all around the piece. You work the egg as a whole and to in one place.
Turn the egg from time to time so you felt everywhere evenly. To start with it will look a mess. Don’t worry it takes time for the shape to form.
Keep your needle straight at all times but angle it in the direction you want your wool to felt. Which is either downward or downward and towards the center of your egg.
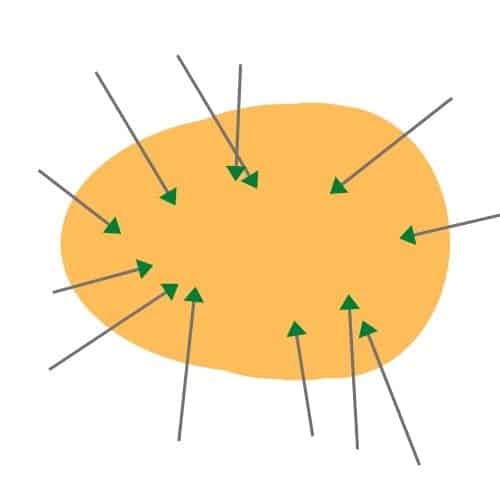
Keep in mind that you want one end larger than the other and shape that into your piece as you go.
6. Keep felting until you have a clear shape, it needs to be firmed up enough to have a clear shape but also be slightly squidgy as you need to work with it to create your egg color and then decorate it if you want to.
7. Now that you have your egg shape in core wool you need to add your colored wool to it.
Pull off some of your colored wool to add to your egg. It doesn’t have to be the exact amount. You can add it in smaller amounts if you want to and not cover the whole egg at once. The aim is to cover the egg fairly evenly but also completely leaving no white core wool showing.
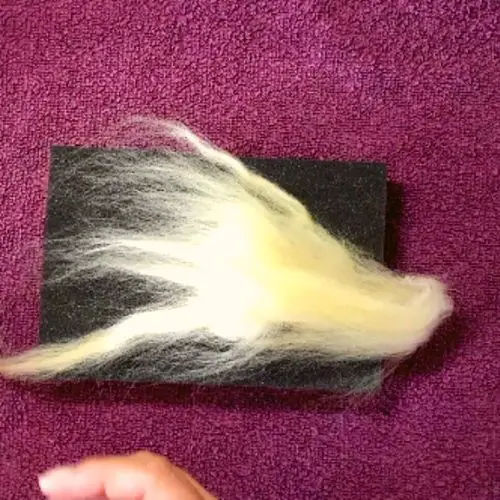
8. Here I am using yellow tops/roving so I have mixed up the fibers to make it easier to felt to the egg base. If you are using batts the fibers are already mixed up so you don’t have to do this.
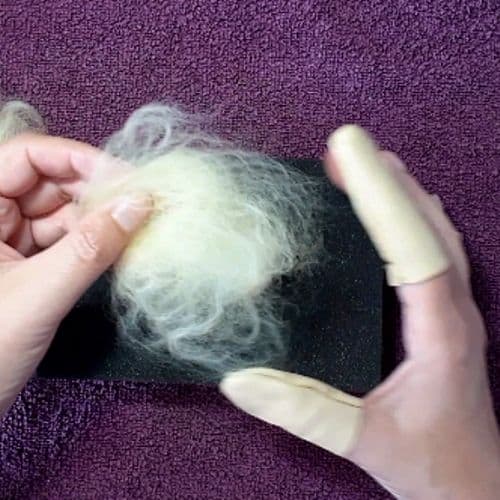
9. Next, attach your fiber to your egg with your needle. You may find you have to go to a smaller needle as it gets more felted.
Make sure you cover the whole egg thoroughly. The layer doesn’t have to be too thick but it does need to be clean.
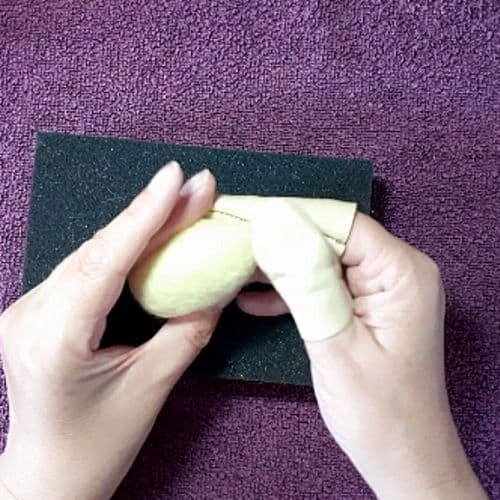
10. Now that you have covered your egg thoroughly check your egg for firmness. If your egg isn’t firm, continue to felt with your triangle needle until it is firm. (unless you want to add designs in which case don’t felt your egg completely firm).
You can tell if the needle needs to go down a size as you will get resistance and it will feel and sound like it’s ‘crunching’. At this point look at your egg and decide if you need to go to a smaller needle or if you are happy with its firmness.
Finishing Touches
If you want to add a picture or shapes to your design you can do that now or you can add shapes as you go. Make sure you leave some give in your project so you can continue to felt if it is too tight it makes it difficult to felt your design onto your egg. But if it’s too loose the same also applies.
Design Ideas For Your Needle Felted Easter Egg
There are lots of ways you can design your egg. This is a good way to start 2D felting.
Some ideas are:
- You can go with the traditional easter themes like easter chicks which are so cute.
- Easter bunnies are always popular.
- A spring theme such as daffodils.
- Or you can simply go with easter colors in different designs or bright colors. (remember though that needle felted items are not toys and should not be given to children).
- You could also put religious symbols or pictures on your eggs.
Other Uses For Felted Egg Shapes
These egg shapes can be used for the bases of other projects and also other shapes in felting.
It’s worth learning them even if you don’t want to use them for easter. Often bodies can start off with an egg shape as can some heads, arms (although they are often more tubular/cylindrical in shape).
Many of my bear bodies start with similar shape.